Introduction
While using your PC, temporary data files may build up over time, eating away valuable space on you Windows 11 system. The files are generated by a variety of processes and programs designed to offer the ability to store data in a temporary manner. They are however, a lot of times there even after they’re no longer used. In this post, we can guide users through the process to delete unnecessary temporary files from Windows 11, helping you to free up space and improve your system’s performance. While reading this information read how to get admin rights on windows 10 without password in detail.
What Are Temporary Files?
Temporary file types are those that are created by programs and processes that store information temporarily. They can be used to store placeholders in the course of keeping information in software installation and caching website content and storing data that is temporary that programs can access. But, they are not necessarily deleted automatically once they’re no longer required, resulting in the accumulation of data over the course of.
The Importance of Deleting Temporary Files
The deletion of temporary files is essential because of a number of reasons. It helps clear the space in your system, which will enhance system performance and stop the possibility of slowdowns. In addition, it makes sure that your computer remains well-organized by reducing the amount of clutter, and makes it simpler to find and organize the files. Also, the removal of temporary files may also help improve your security by taking away the possibility of storing sensitive information within temporary files.
Accessing the Disk Cleanup Utility
Windows 11 provides a built-in program known as Disk Cleanup that enables the deletion of temporary files with ease. To use this Disk Cleanup utility, follow these instructions:
- Click the Windows button + S to access the bar of search.
- Enter “Disk Cleanup” and select this option in the results.
- It will open the Disk Cleanup utility and display a list of documents you are able to delete in order to clear space on your PC.
Selecting the Temporary Files to Delete
When you’ve launched the Disk Cleanup program You can select the temporary files that you would like to eliminate. It provides a listing of file types, such as temporary web documents, system files and downloaded programs files. The categories you can choose from are: system files, temporary internet files, and downloaded program files. that you want to clear by selecting the appropriate checkboxes.
Using the Storage Settings App
Windows 11 also offers a Storage Settings app, which allows users to control and remove temporary files. To open the Storage Settings application Follow these steps:
- Press the Start button then select the gear icon in order to launch the Settings application.
- Within the Settings application, select “System” in the Settings app “System” category.
- Click “Storage.” Select the “Storage” option from the left-hand menu.
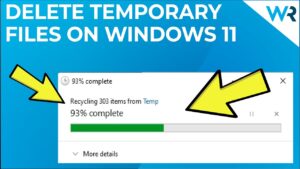
- Within the Storage Settings, choose “Temporary files” under the “Temporary files” option.
- The list will consist of the categories that you can file in. Make sure to check the checkboxes beside the categories you’d like to eliminate, like recycling bins, temporary files as well as others.
- Select “Remove files” or click on the “Remove files” button to erase the selected temporary file.
Cleaning Temporary Files using Third-Party Software
Apart from the included Windows tools, it is possible to utilize third-party applications to clean temporary files. A variety of options for software are offered like Cleaner that comes with sophisticated features to clean up temporary files while also improving system performance. When you use third-party software ensure that you obtain it from a reliable source and adhere to the guidelines given by the developer of the software.
Automating the Deletion Process
In order to make it easier for deletion of temporary files, it is possible to automate the process by using Windows built-in programs as well as third-party applications. Windows Task Scheduler allows you to design a scheduled task which runs on specific intervals, and then automatically remove temporary files, without any need for manual intervention. Additionally, a few third-party applications offer automation options that are able to be set to remove temporary files on a frequent interval.
Conclusion
The removal of unwanted temporary files is vital to keeping a tidy and efficient Windows 11 system. If you follow the steps that are described in this article it is easy to remove temporary files to free the space on your storage. It doesn’t matter if you’re using an integrated Disk Cleanup utility, the Storage Settings application and third-party programs regularly deleting temporary files can help boost the performance of your system and help maintain your system’s organization.


Leave a Reply